 |
| Image by :1.bp.blogspot.com |
 |
| Image by :1.bp.blogspot.com |
 |
| Image by :1.bp.blogspot.com |
 |
| Image by :1.bp.blogspot.com |
 |
| Image by :1.bp.blogspot.com |
|
| Image by :1.bp.blogspot.com |
|
| Image by :1.bp.blogspot.com |
|
| Image by :1.bp.blogspot.com |
|
| Image by :1.bp.blogspot.com |
|
| Image by :1.bp.blogspot.com |

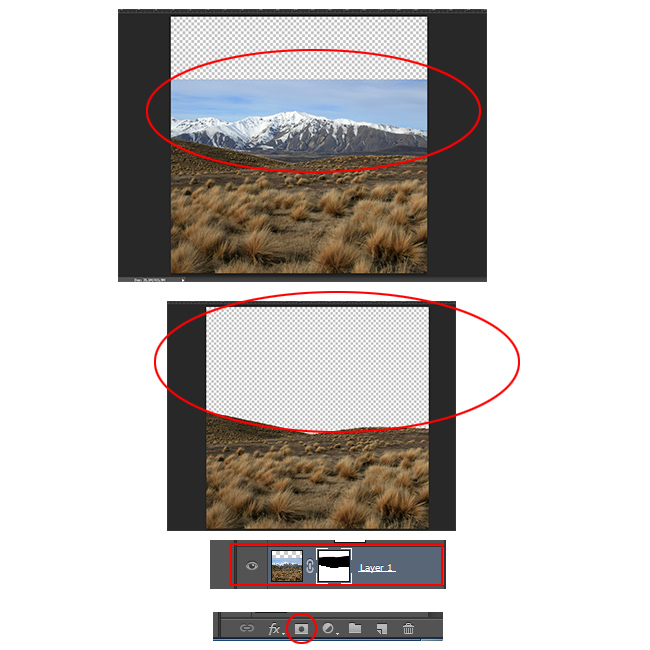
Open the Background image and delete the mountains. Create a layer mask and use the Brush Tool and begin to delete this area as shown below.
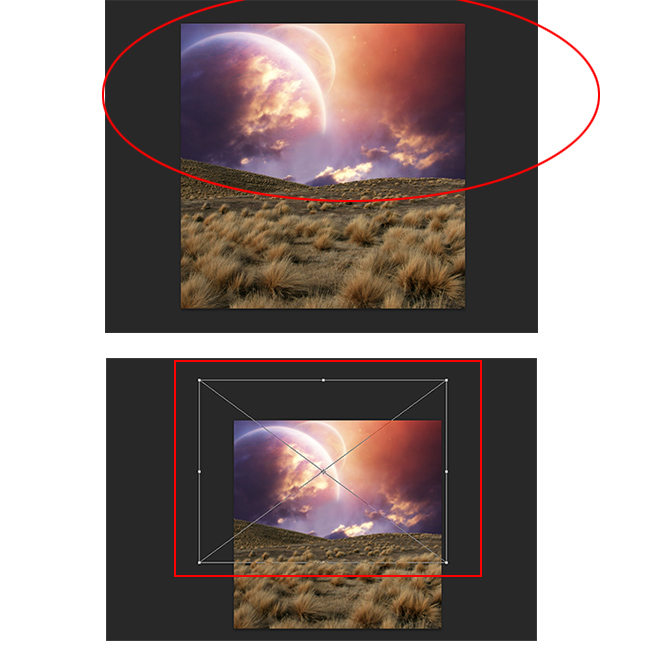
Place the "Cosmos" stock image below Background layer and rasterize holding (Shift+ALT) and press enter.
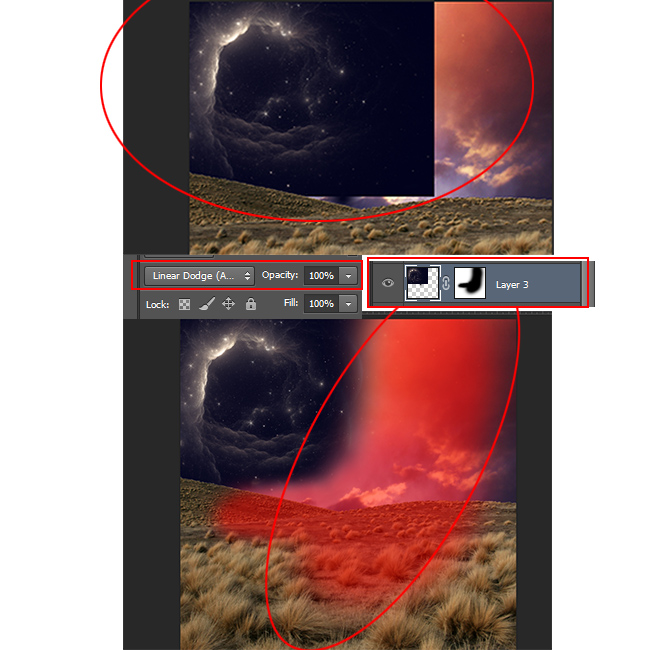
Open the "Space Hole" and place it on the cosmos (planet) like in the picture. Press CTRL+T to transform it and right click and choose flip horizontal>. Now create a layer mask and use a brush tool to delete unnecessary part (shown in red). Blend mode is set to Linear Dodge.
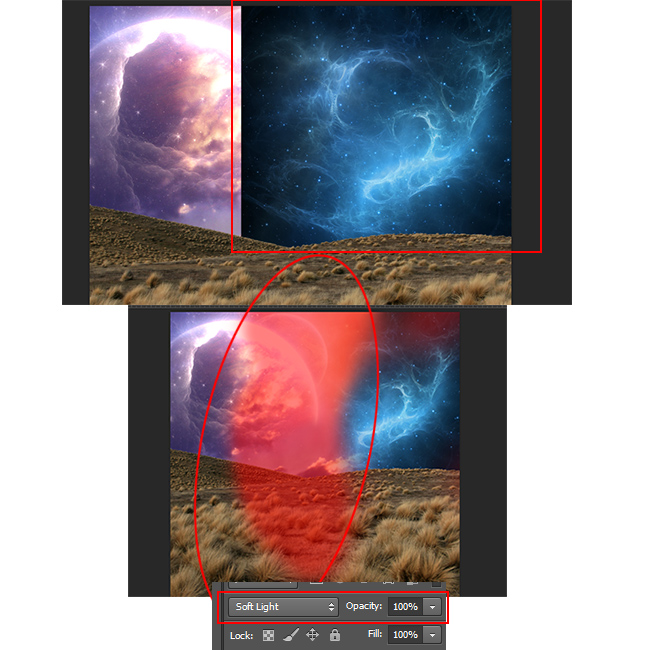
Now place "Cosmos1" and repeat the procedure as shown in the previous step with blend mode Soft Light.
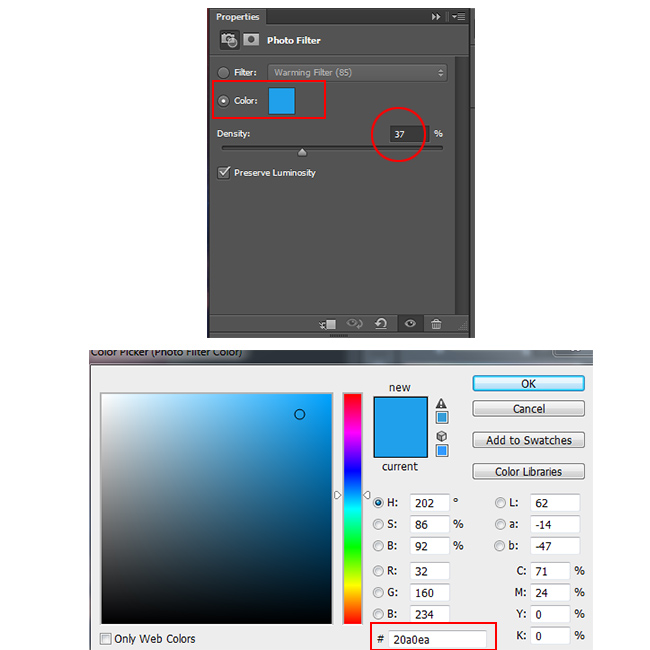
Create a Photo Filter, use a blue color (code #20a0ea) with Density 37%. Opacity set to 85%.
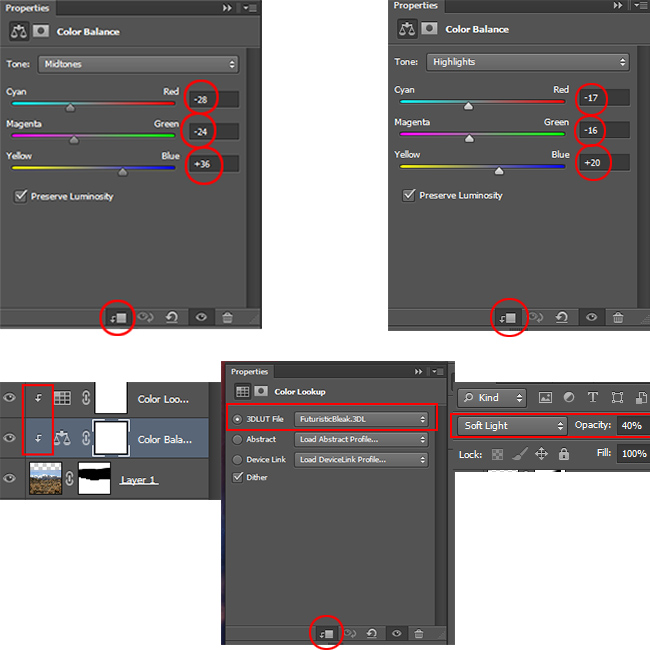
Now add a Color Balance/Color Lookup and Clipping mask to the background (Right Click - Clipping mask). Set the Midtones (-28 -24 +36) and the Highlights (-17 -16 +20). Opacity is set to 85%. Now add Color Lookup and filter set to "FuturisticBleak" with blend mode Soft Light and opacity 40%.
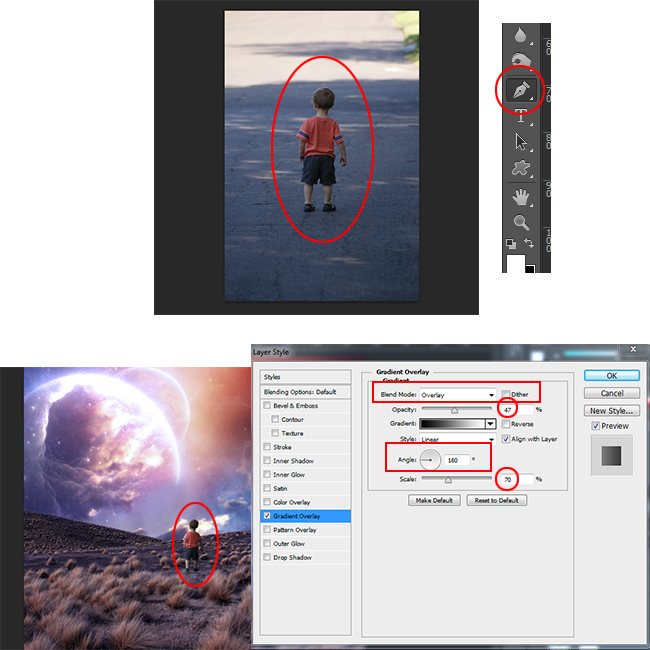
Place the Children image into your file. Right click on layer and select Blending Options; check Gradient Overlay with Blend mode Overlay, opacity 47% angle 180 and scale 70%.
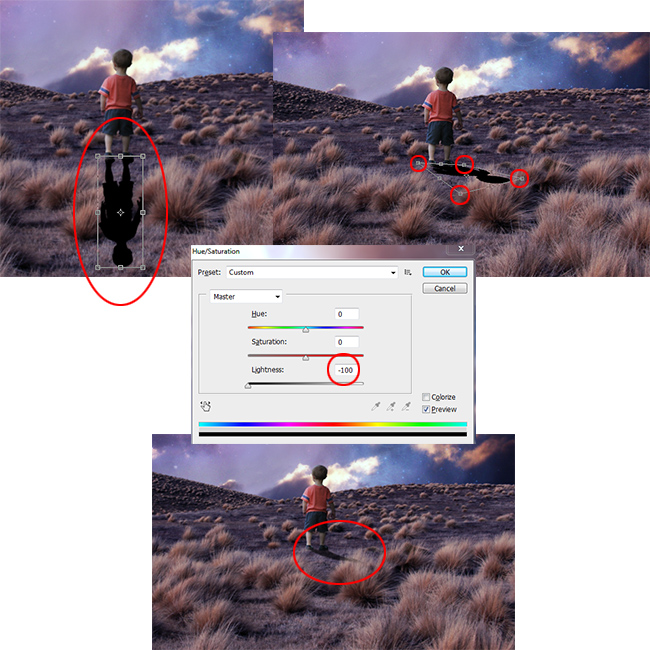
Now duplicate children layer (CTRL+J) and press CTRL+U to set the lightness to -100. Transform it (CTRL+T), flip vertical and hold CTRL to transform and distort the image. Go to Filter>Blur>Gaussian Blur and set to 4. Opacity is set to 65%. You can delete some parts of the shadow by creating a layer mask and using the brush tool.
Learn how to cast shadow in Photoshop from these easy to follow tutorials for beginners.
You can also try this Drop shadow Photoshop action.
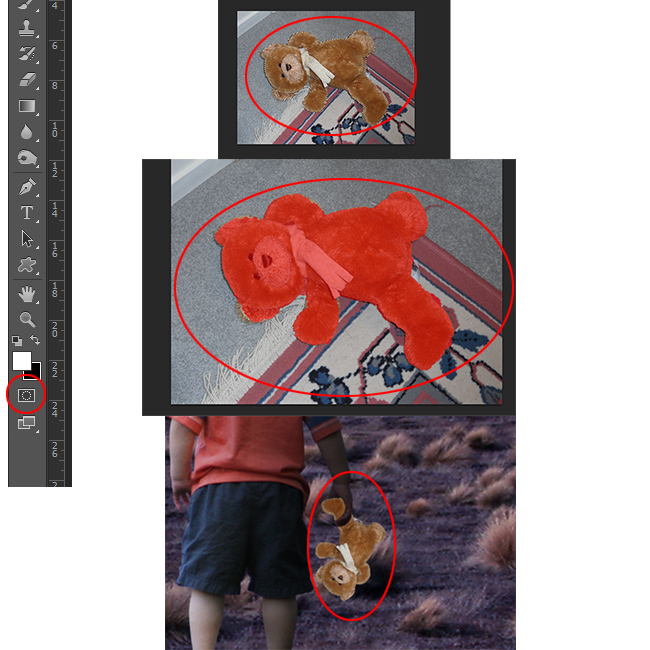
Open "Teddy Bear" and use the Quick Selection Tool to make a rough selection. Press CTRL+SHIFT+I to invert the selection. Now press Quick Mask Mode, use the brush tool to select precisely the rest. Again press Quick Mask Mode (standard mode) and CTRL+C to copy. Resterize image and delete some parts where the hand is.
Another method to create a precise selection in Photoshop is by using the pen tool which is probably the best method to cutout an object/person by removing the background.
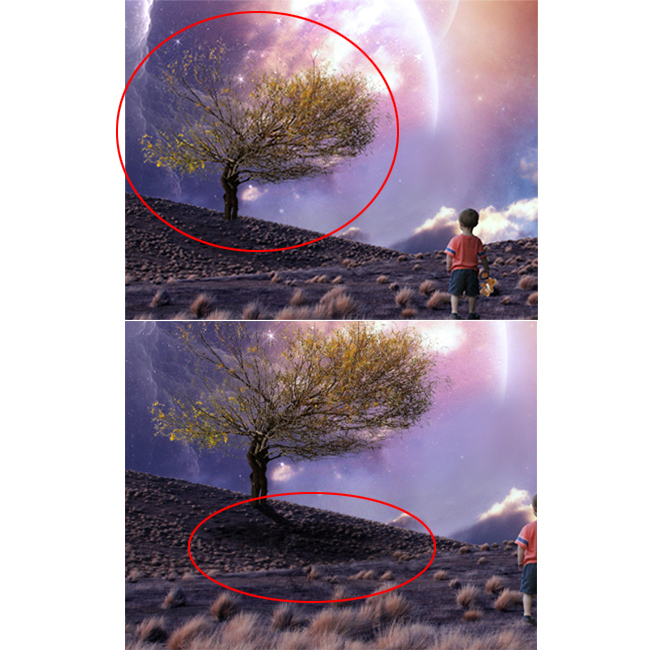
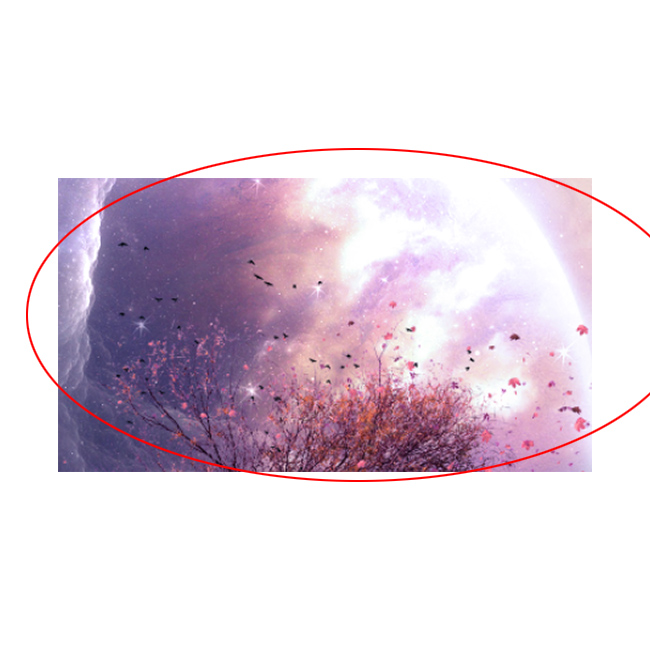
Place the "Tree" stock image and repeat the cast shadow procedure made in the step1/Part2 with opacity 75% .
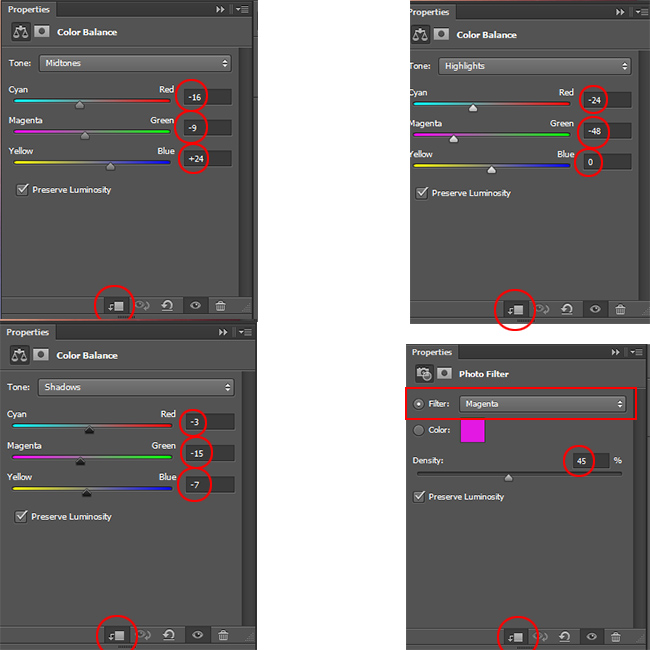
Create new Adjustment Layer>Color Balance set clipping mask and use these setttings: Midtones (-16 -9 +24), Highlihts (-24 -48 0) and Shadow (-3 -15 -7). Add Photo Filter with Clipping mask, filter set to Magenta and Density 45%.
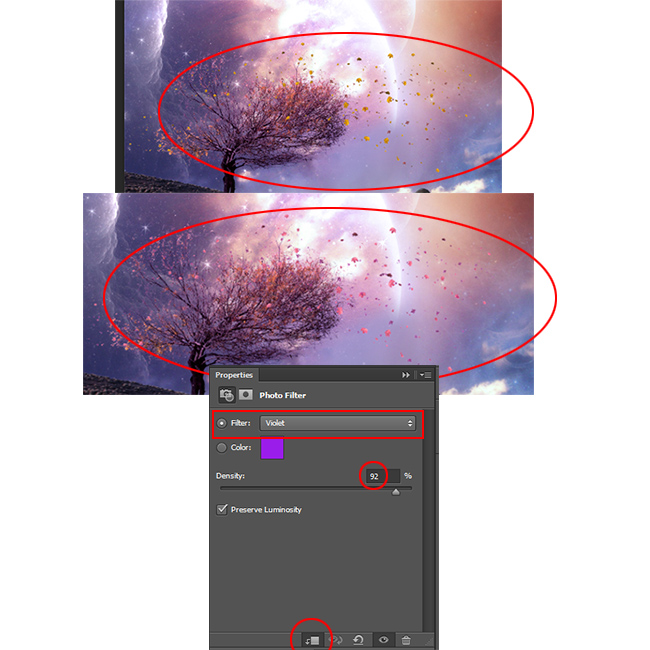
Place "Leaves" and duplicate and rotate with the transform tool (CTRL+T) Add Photo Filter (Clipping mask On) with filter set to Violet and Destiny 92%.
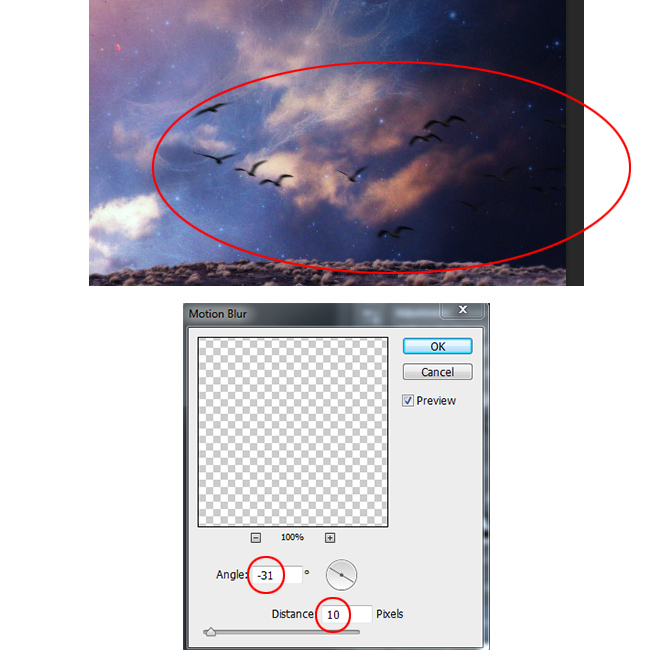
Place "Birds" and go to Filter>Blur>Motion Blur and set Angle to -31 and Distance 10px.
Add another Birds around the tree.
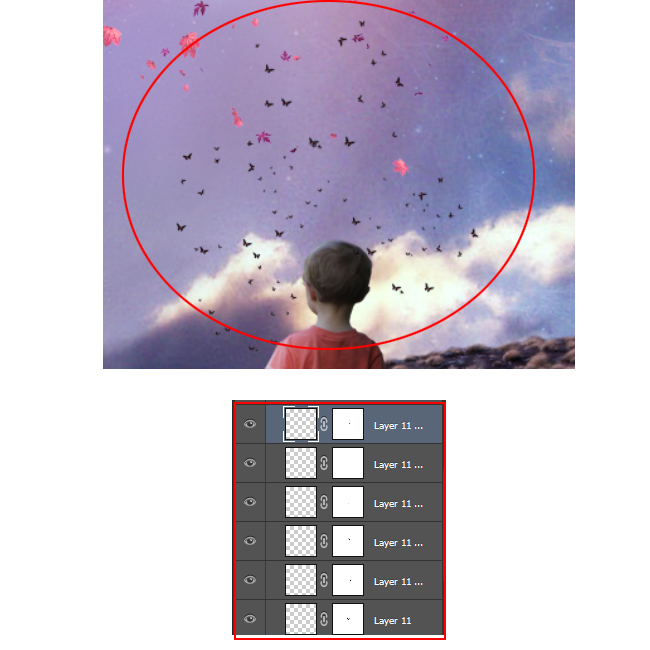
Place "Buterrlfy" and create a layer mask to delete some parts with the brush tool. Remove some butterflies. Now duplicate the layer a couple of times like in the picture.
Add "Flare" andcreate layer mask to delete some parts (red color) using the brush tool like shown in the preview. Blend mode is set to Screen.

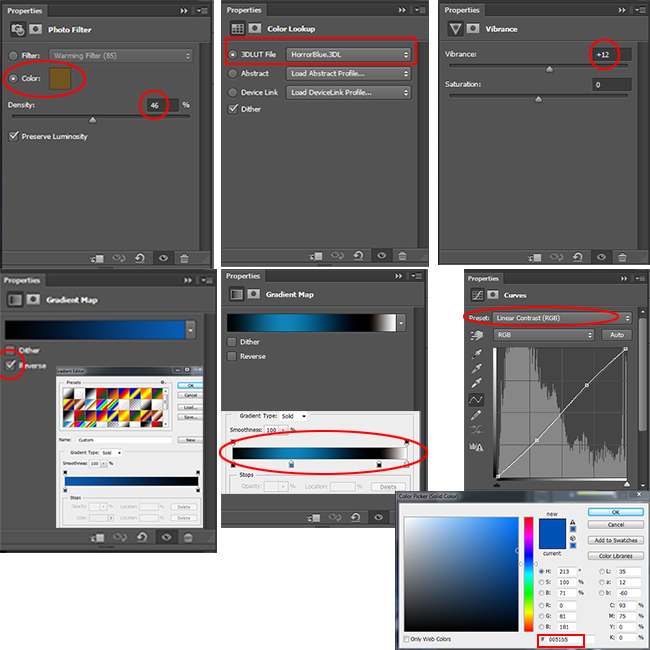
Now we will add some Adjusment layers to create an intense photo effect with magical color tones.
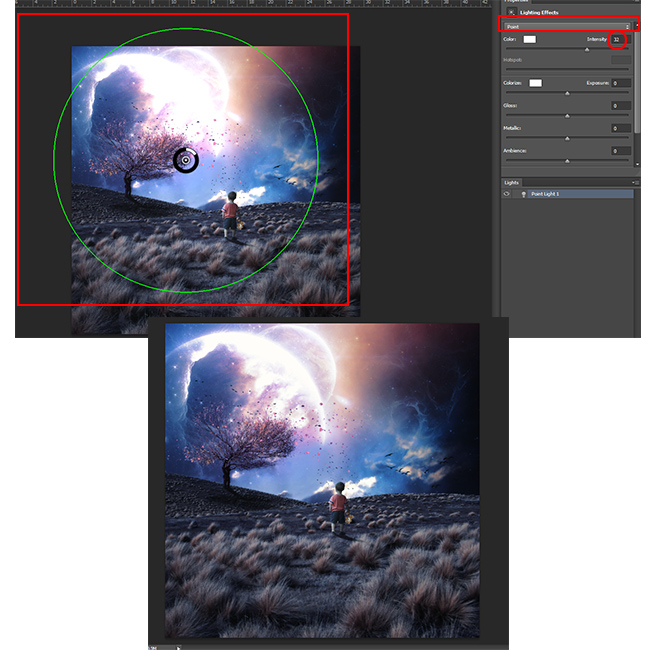
Press CTRL+SHIFT+ALT+E to merge all layers. Go to Filter>Render>Lighting Effect. Preset set to Point and intensity 32. Create a layer mask and use the brush tool with black foreground color; brush on the light source on planet. Blend mode is set to 55%.
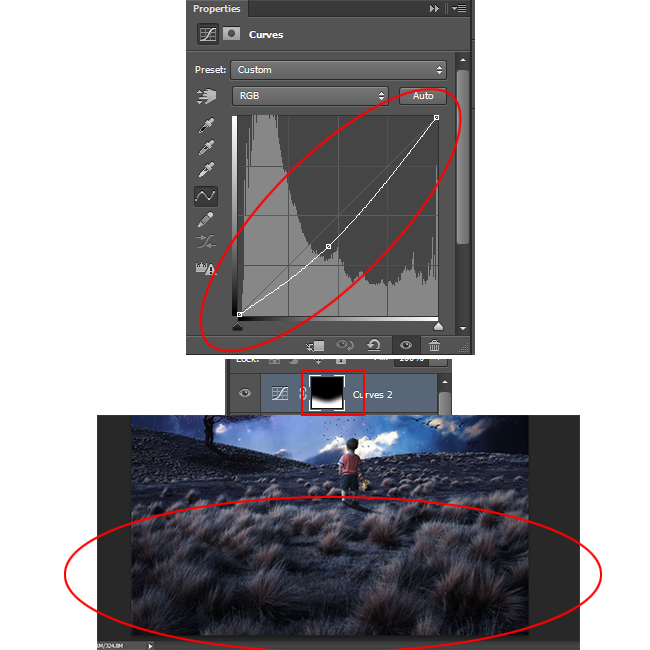
Go to Adjustment Layer>Curves and press CTRL+I to invert. Use the brush tool with foreground color White. Click on layer mask and Brush on the bottom of the image.
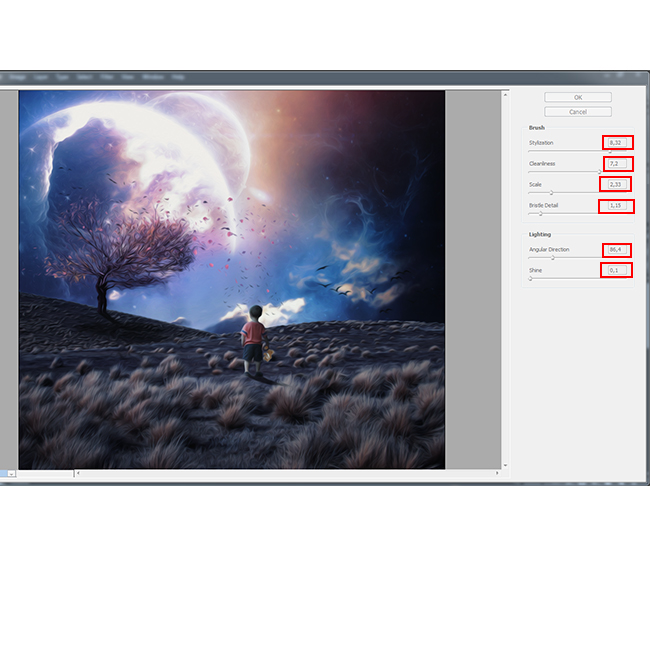
Press CTRL+SHIFT+ALT+E again to merge all layers. Go to Filter>Oil Paint(The Oil Paint filter is available only for Photoshop CS6) and make these settings. Opacity is set to 75%.
Here is a quick Photoshop time-lapse video tutorial to see exactly how this photo manipulation was created.
So this is the final result of the Childhood Secret Place Fantasy Photoshop manipulation tutorial. Hope you all enjoyed this new tutorial.
Assalamualaikum teman selamat siang selamat berjumpa kembali dengan saya hehe. Buat kamu yang suka edit edit foto tetapi hasil editannya biasa biasa saja, disini saya akan berbagi tips cara mengedit/memanipulasi foto yang berbeda dengan hasil editan yang lain. Mau tau gimana caranya? Yuk mari
Cara memanipulasi foto di Photoshop


Jika sudah selesai menyeleksi sekarang teman teman tekan CTRL + SHIFT + I untuk membalikan daerah luar dari cangkir tersebut yang terseleksi. Jangan lupa munculkan kembali objek gambar rumputnya, tekan Del untuk menghapus bagian rumput yang tidak di gunakan.

Agar gambar terkesan lebih bagus buat agak gelap diarea pohon caranya aktifkan layer gambar pohon tersebut kemudian tekan CTRL + SHIFT + B. Jika masih kurang redup teman teman bisa meredupkan cahayanya menggunakan Curve (CTRL + M)

Area yang akan digelapkan saya beri tanda merah kemudian di Burn

Alhamdulillah setelah menguras kesabaran yang cukup ekstra akhirnya jadi juga manipulasi foto yang berbeda dengan yang lain. Manipulasi yang penuh imajinasi.
Semoga bermanfaat bro sist 