- MANIPULASI PICTURE FANTASI

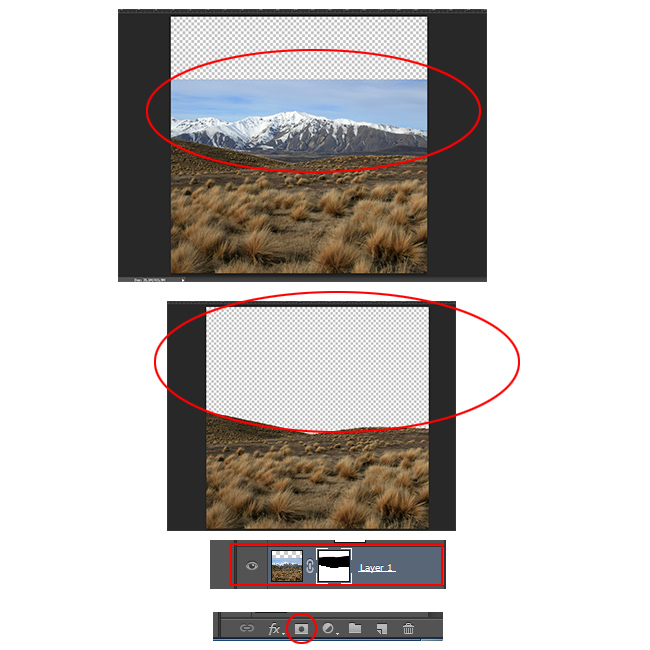
Open the Background image and delete the mountains. Create a layer mask and use the Brush Tool and begin to delete this area as shown below.
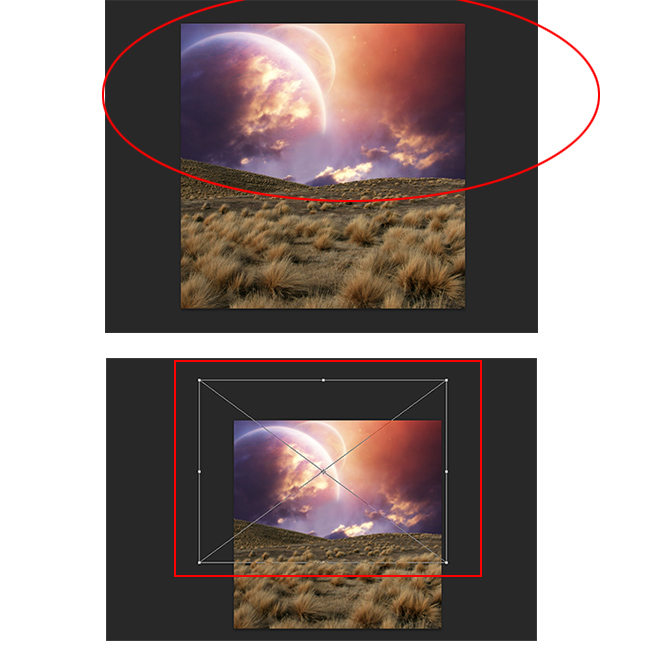
Place the "Cosmos" stock image below Background layer and rasterize holding (Shift+ALT) and press enter.
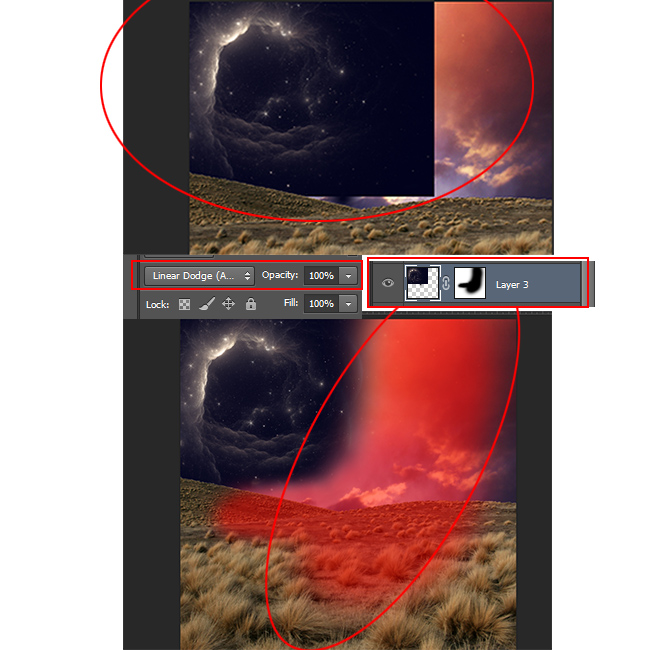
Open the "Space Hole" and place it on the cosmos (planet) like in the picture. Press CTRL+T to transform it and right click and choose flip horizontal>. Now create a layer mask and use a brush tool to delete unnecessary part (shown in red). Blend mode is set to Linear Dodge.
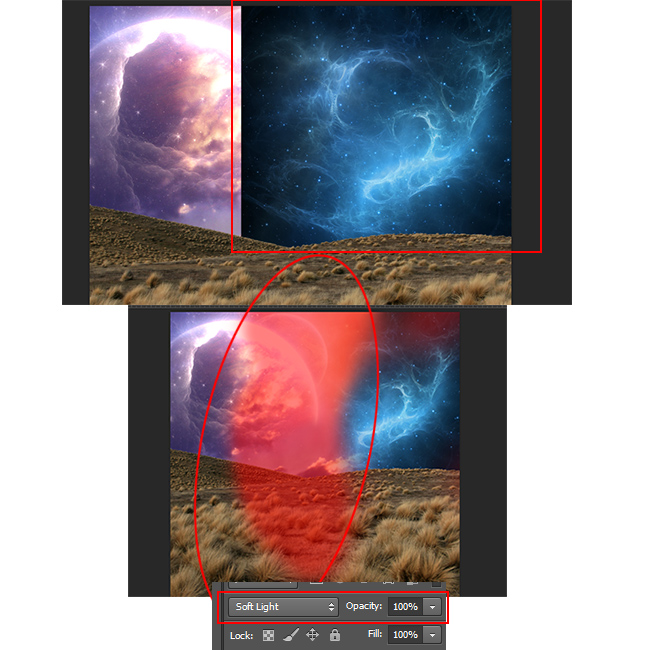
Now place "Cosmos1" and repeat the procedure as shown in the previous step with blend mode Soft Light.
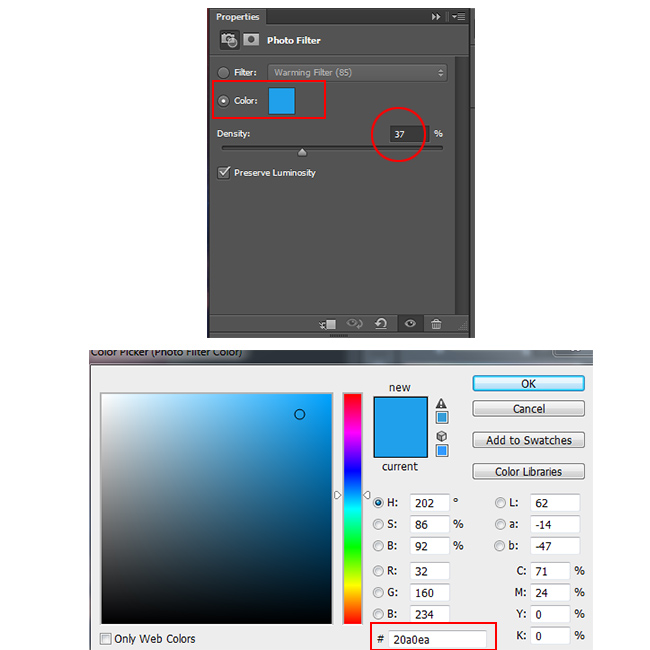
Create a Photo Filter, use a blue color (code #20a0ea) with Density 37%. Opacity set to 85%.
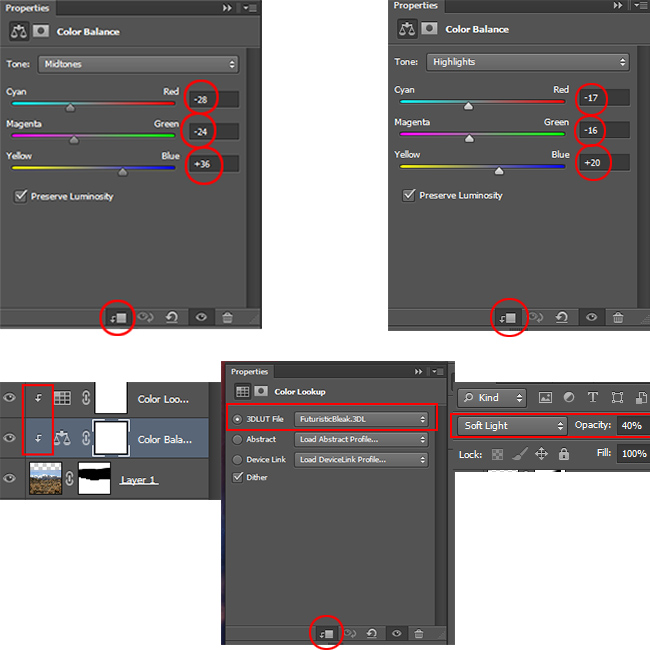
Now add a Color Balance/Color Lookup and Clipping mask to the background (Right Click - Clipping mask). Set the Midtones (-28 -24 +36) and the Highlights (-17 -16 +20). Opacity is set to 85%. Now add Color Lookup and filter set to "FuturisticBleak" with blend mode Soft Light and opacity 40%.
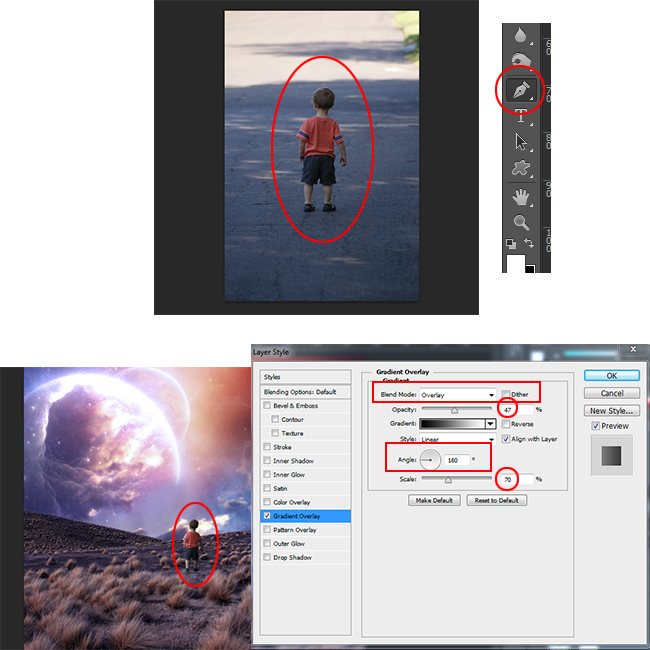
Place the Children image into your file. Right click on layer and select Blending Options; check Gradient Overlay with Blend mode Overlay, opacity 47% angle 180 and scale 70%.
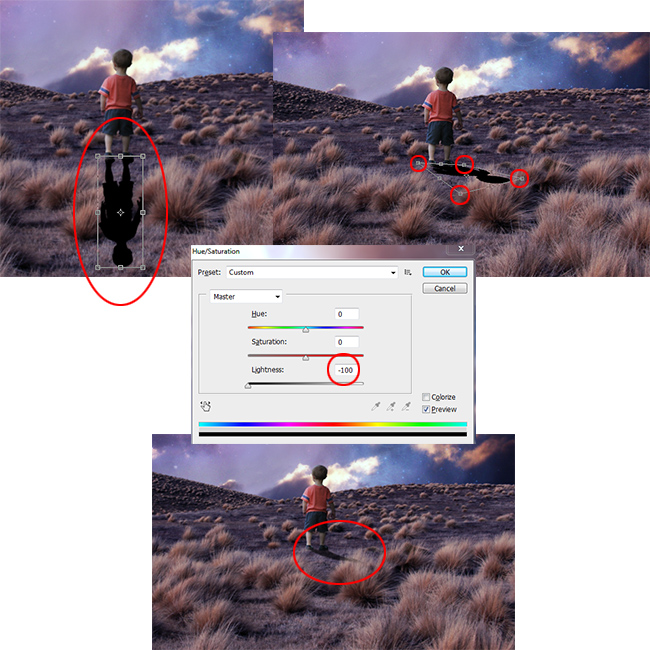
Now duplicate children layer (CTRL+J) and press CTRL+U to set the lightness to -100. Transform it (CTRL+T), flip vertical and hold CTRL to transform and distort the image. Go to Filter>Blur>Gaussian Blur and set to 4. Opacity is set to 65%. You can delete some parts of the shadow by creating a layer mask and using the brush tool.
Learn how to cast shadow in Photoshop from these easy to follow tutorials for beginners.
You can also try this Drop shadow Photoshop action.
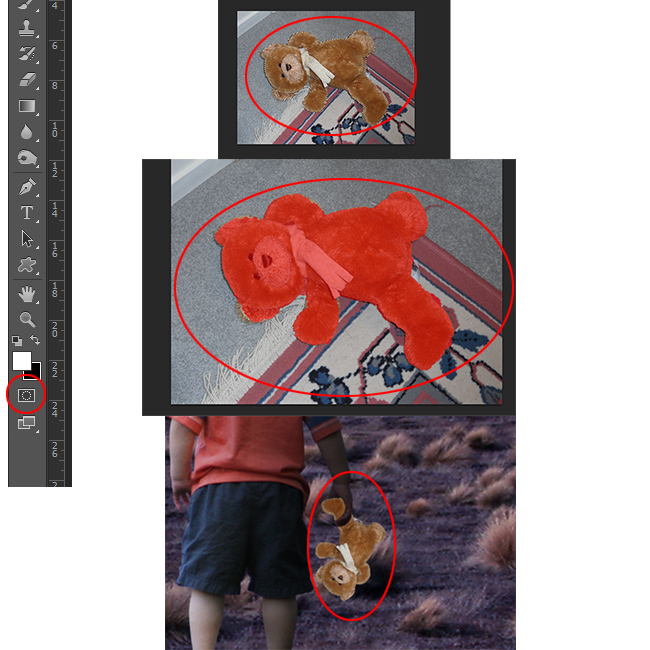
Open "Teddy Bear" and use the Quick Selection Tool to make a rough selection. Press CTRL+SHIFT+I to invert the selection. Now press Quick Mask Mode, use the brush tool to select precisely the rest. Again press Quick Mask Mode (standard mode) and CTRL+C to copy. Resterize image and delete some parts where the hand is.
Another method to create a precise selection in Photoshop is by using the pen tool which is probably the best method to cutout an object/person by removing the background.
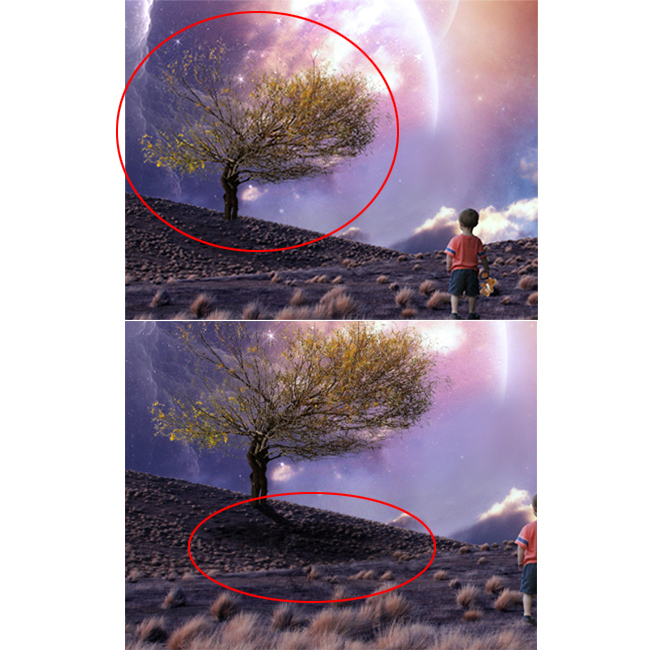
Place the "Tree" stock image and repeat the cast shadow procedure made in the step1/Part2 with opacity 75% .
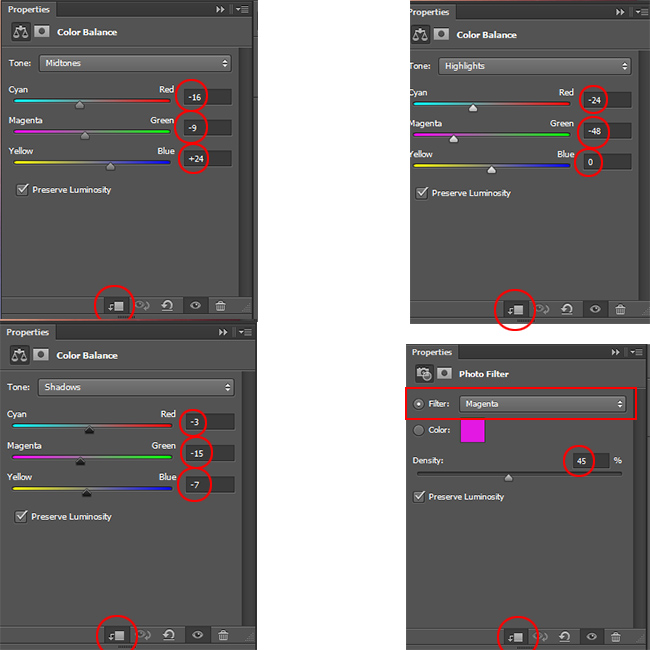
Create new Adjustment Layer>Color Balance set clipping mask and use these setttings: Midtones (-16 -9 +24), Highlihts (-24 -48 0) and Shadow (-3 -15 -7). Add Photo Filter with Clipping mask, filter set to Magenta and Density 45%.
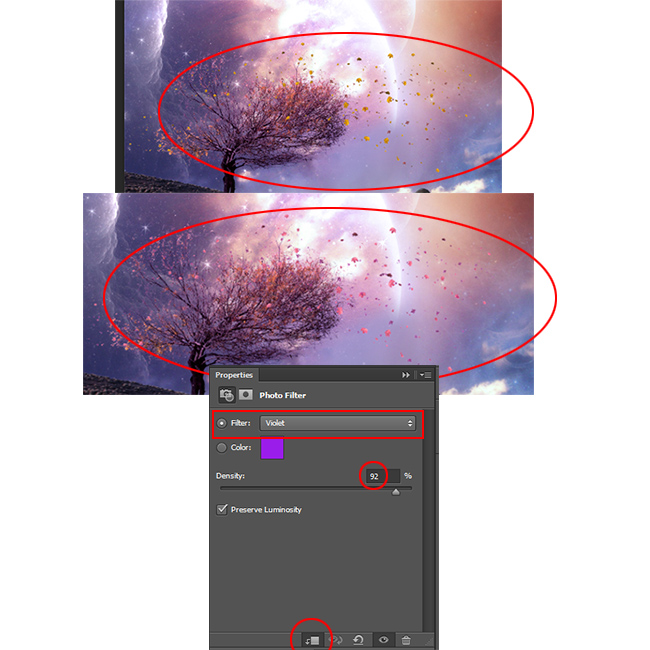
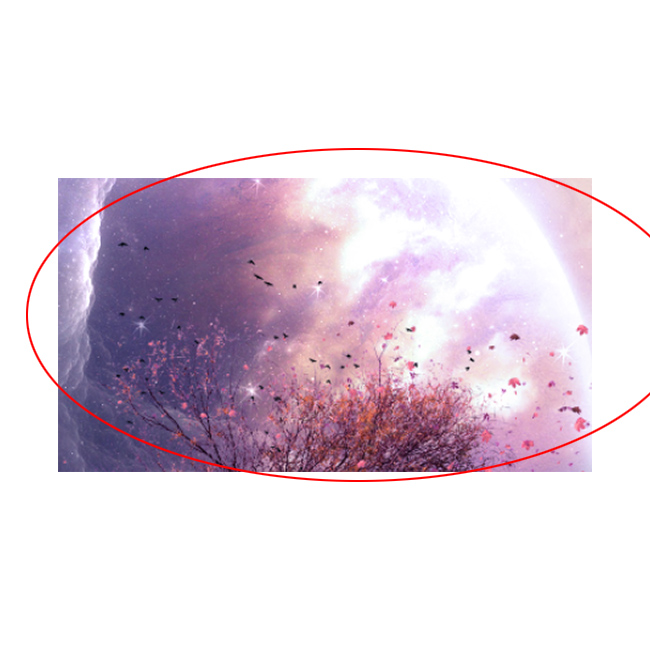
Place "Leaves" and duplicate and rotate with the transform tool (CTRL+T) Add Photo Filter (Clipping mask On) with filter set to Violet and Destiny 92%.
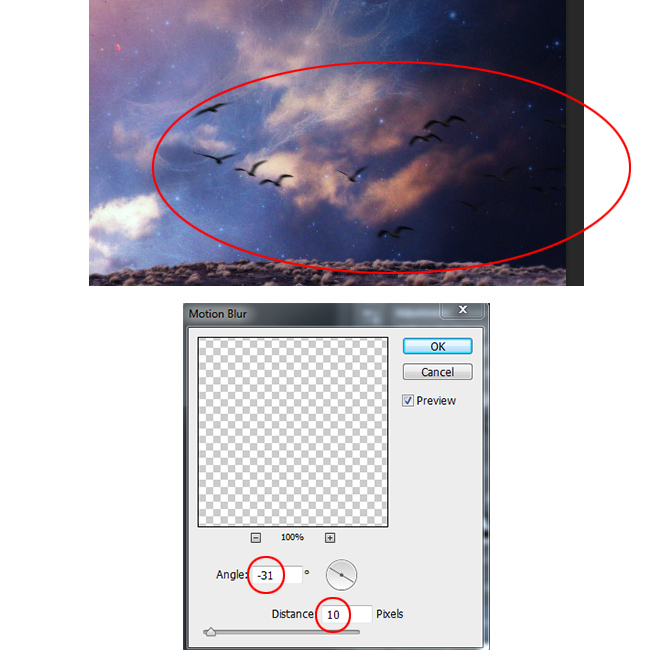
Place "Birds" and go to Filter>Blur>Motion Blur and set Angle to -31 and Distance 10px.
Add another Birds around the tree.
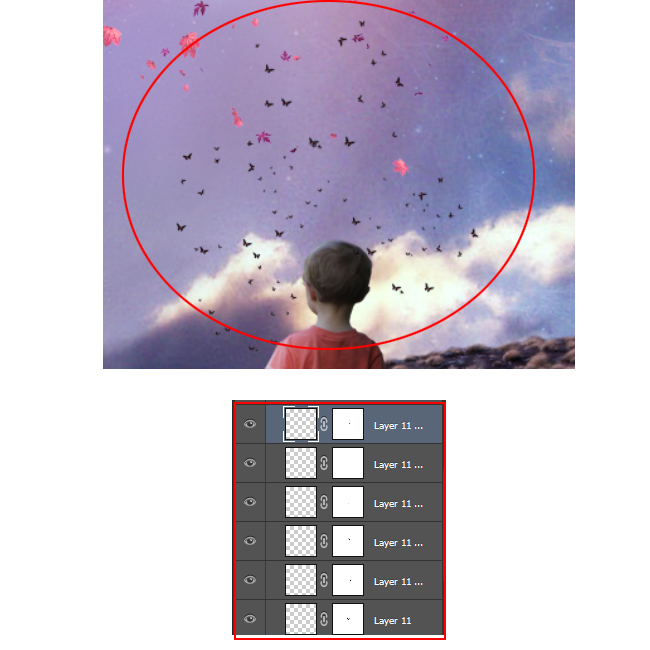
Place "Buterrlfy" and create a layer mask to delete some parts with the brush tool. Remove some butterflies. Now duplicate the layer a couple of times like in the picture.
Add "Flare" andcreate layer mask to delete some parts (red color) using the brush tool like shown in the preview. Blend mode is set to Screen.

Now we will add some Adjusment layers to create an intense photo effect with magical color tones.
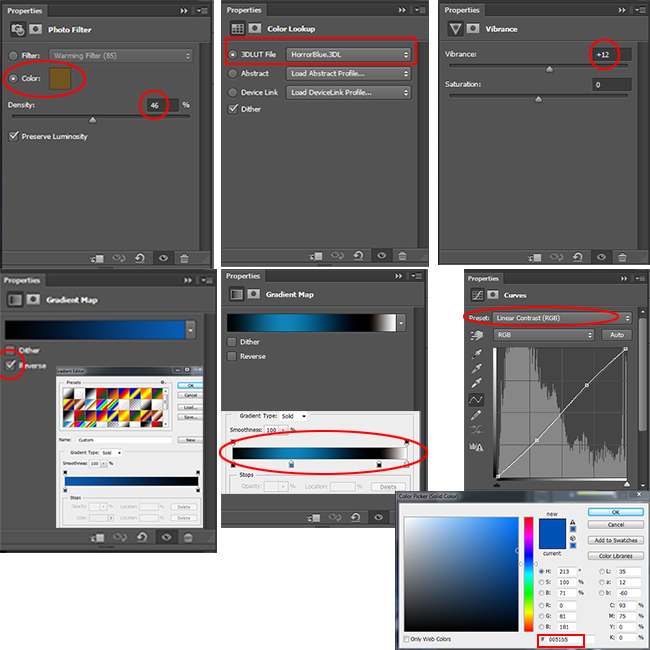
- Go to Adjustment Layer>color lookup, set to HorrorBlue with opacity 20%
- Go to Adjustment Layer>Photo Filter, color set to 73541f with Density 46%
- Go to Adjustment Layer>Vibrance, Vibrance +12 Saturation 0
- Go to Adjustment Layer>Gradient Map and set first color bluie and second black. Blend mode set to Soft Light with opacity 15%.
- Go to Adjustment Layer>Gradient Map and choise colors as the picture. Click on layer mask and use brush tool with opacity 50%. Delete gradient map on background and children. Blend mode set to Soft Light with opacity 55%.
- Go to Adjustment Layer>Curves, in preset choise Linear Contrast (RGB).Repeat procedure as in previous step, but only on children use layer mask.
- Go to Adjustment Layer>Solid Color, seto color code 0051b5 and blend mode set ot Soft Light with opacity 11%
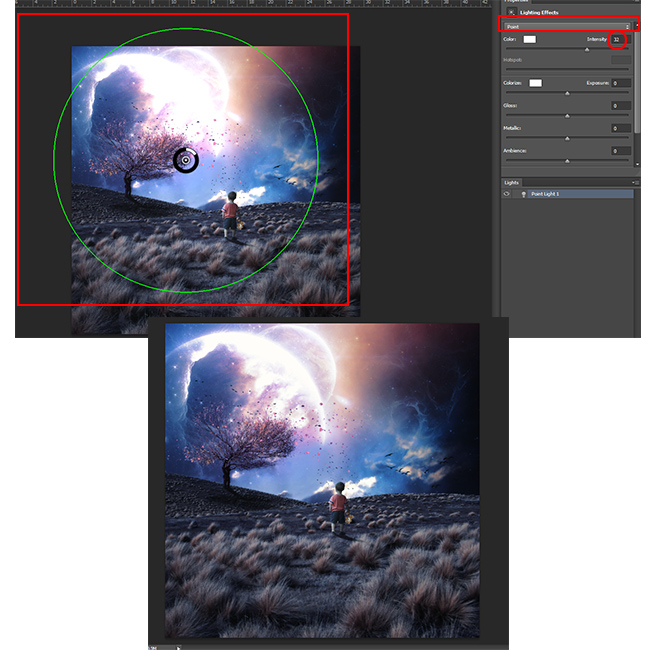
Press CTRL+SHIFT+ALT+E to merge all layers. Go to Filter>Render>Lighting Effect. Preset set to Point and intensity 32. Create a layer mask and use the brush tool with black foreground color; brush on the light source on planet. Blend mode is set to 55%.
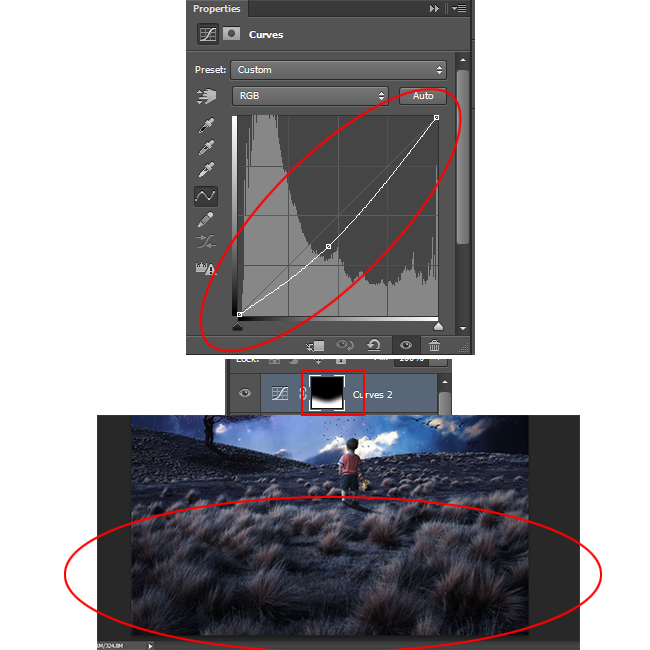
Go to Adjustment Layer>Curves and press CTRL+I to invert. Use the brush tool with foreground color White. Click on layer mask and Brush on the bottom of the image.
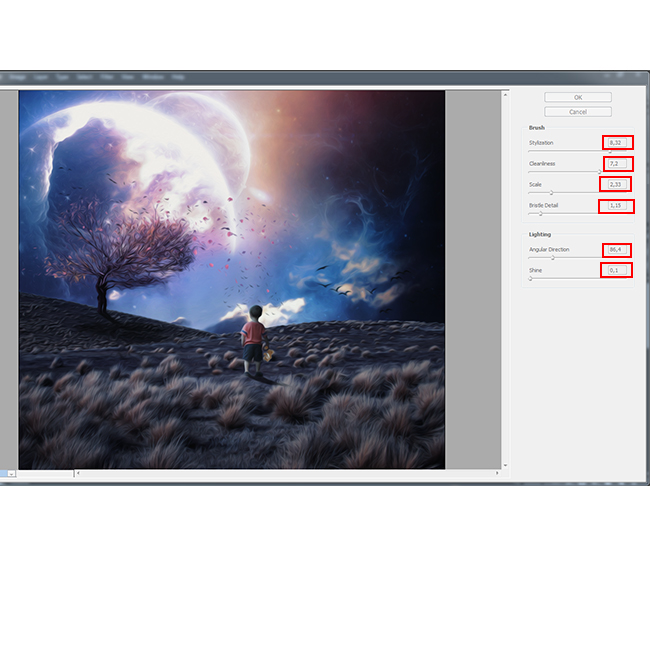
Press CTRL+SHIFT+ALT+E again to merge all layers. Go to Filter>Oil Paint(The Oil Paint filter is available only for Photoshop CS6) and make these settings. Opacity is set to 75%.
Here is a quick Photoshop time-lapse video tutorial to see exactly how this photo manipulation was created.
So this is the final result of the Childhood Secret Place Fantasy Photoshop manipulation tutorial. Hope you all enjoyed this new tutorial.
Tidak ada komentar:
Posting Komentar